Customize templates
In Paylands we offer the possibility to customize the templates for the different payment methods that are shown to customers during the checkout process. In the following guide we will see how we can configure and customize the different templates depending on the needs of the merchant.
We have access to the configuration of the templates from the Paylands Backend → Customization → Templates. Here we will find a list of the customized templates we have created.
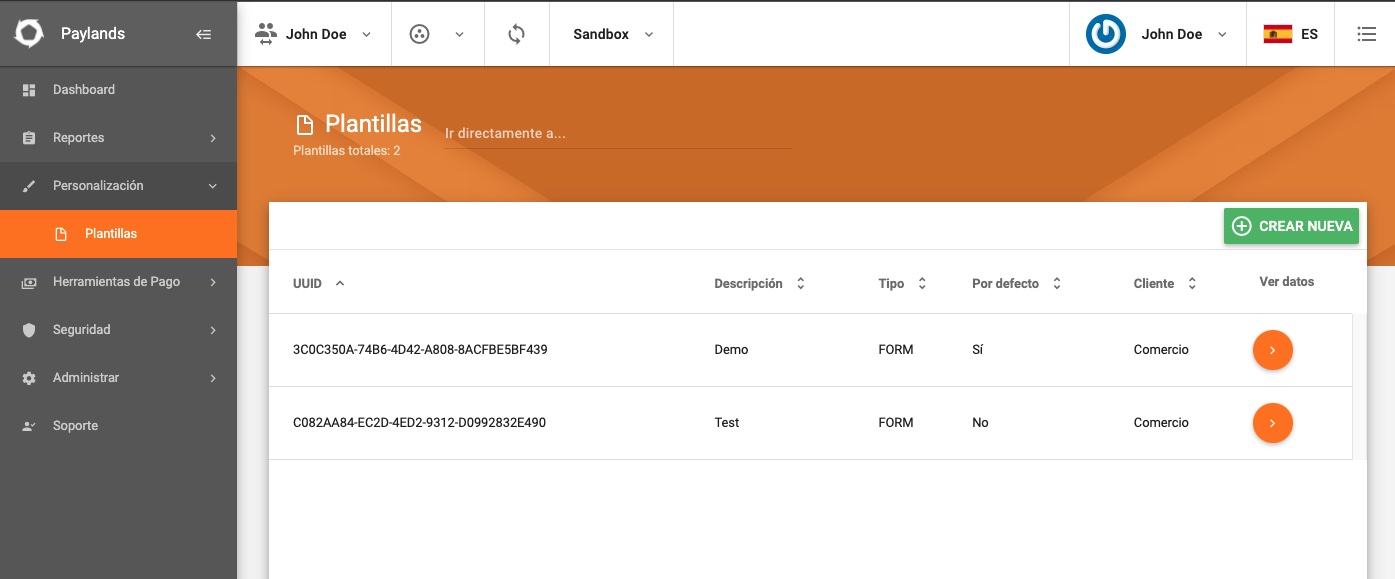
Initially this list will appear empty so Paylands will be showing in the payment flows the default templates. To customize a new template we must click the Create New button to access the customization form.
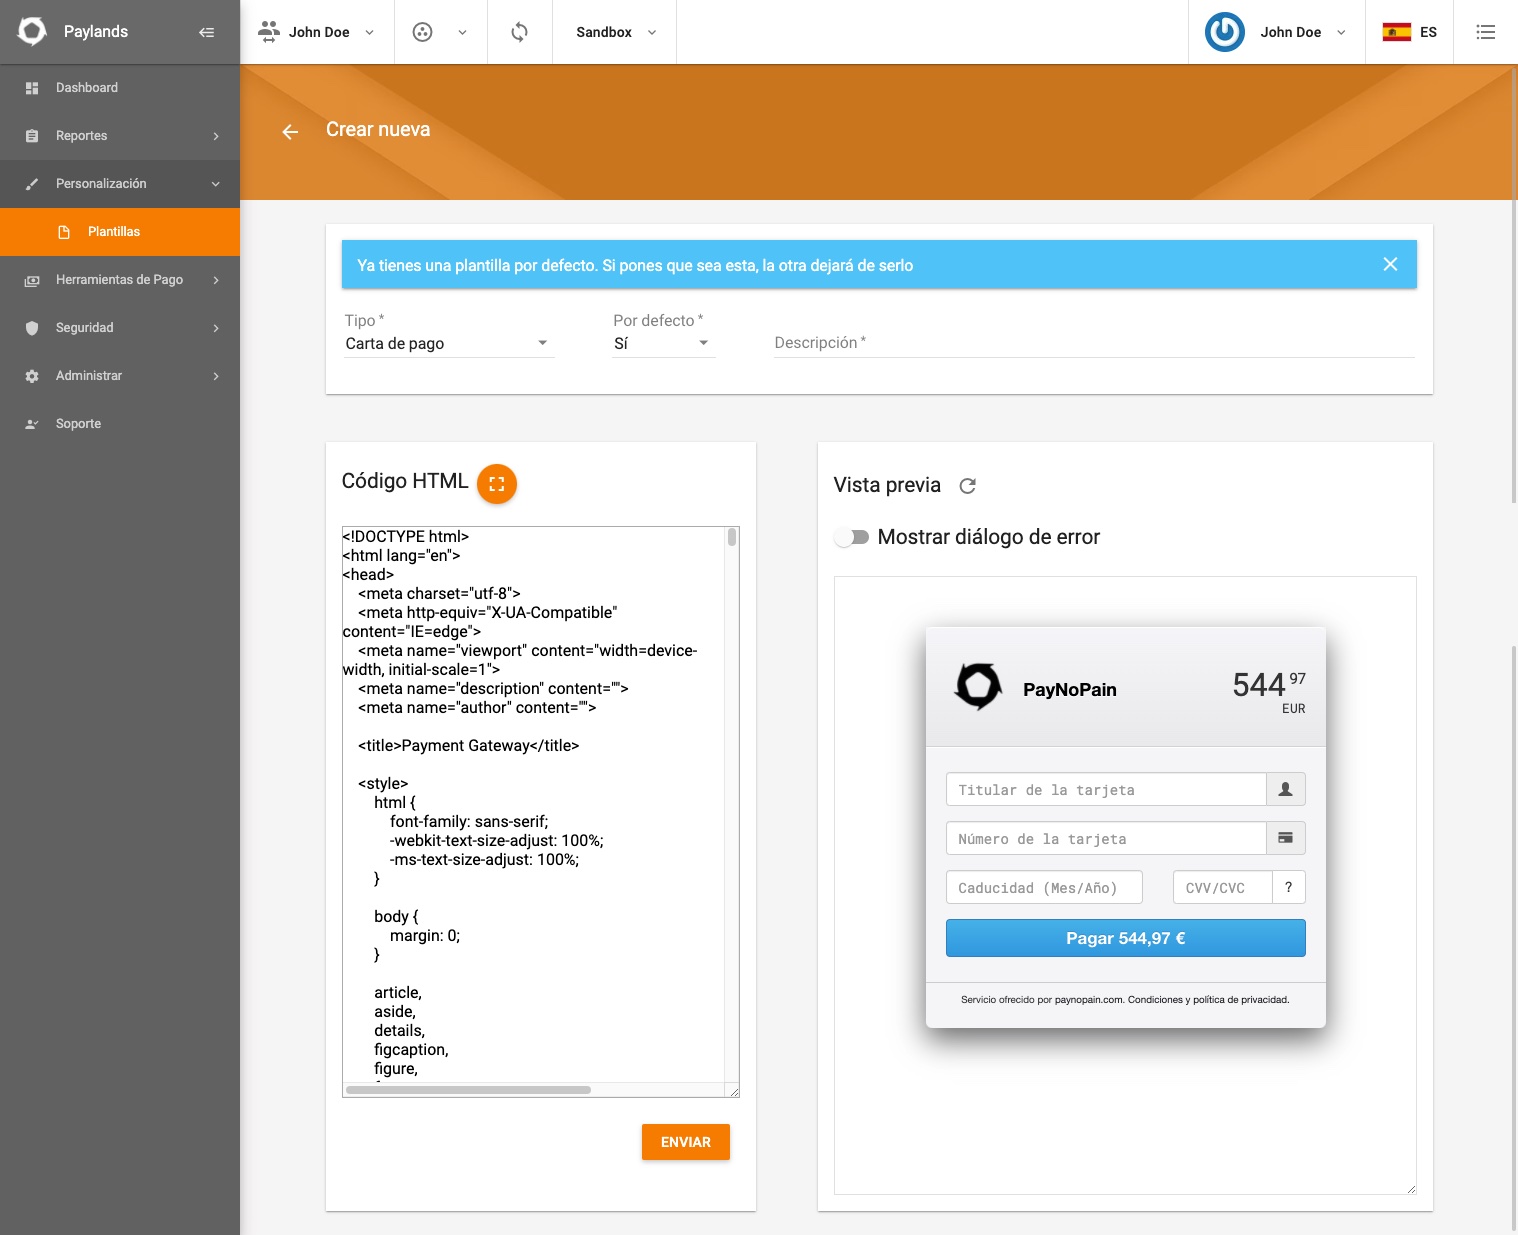
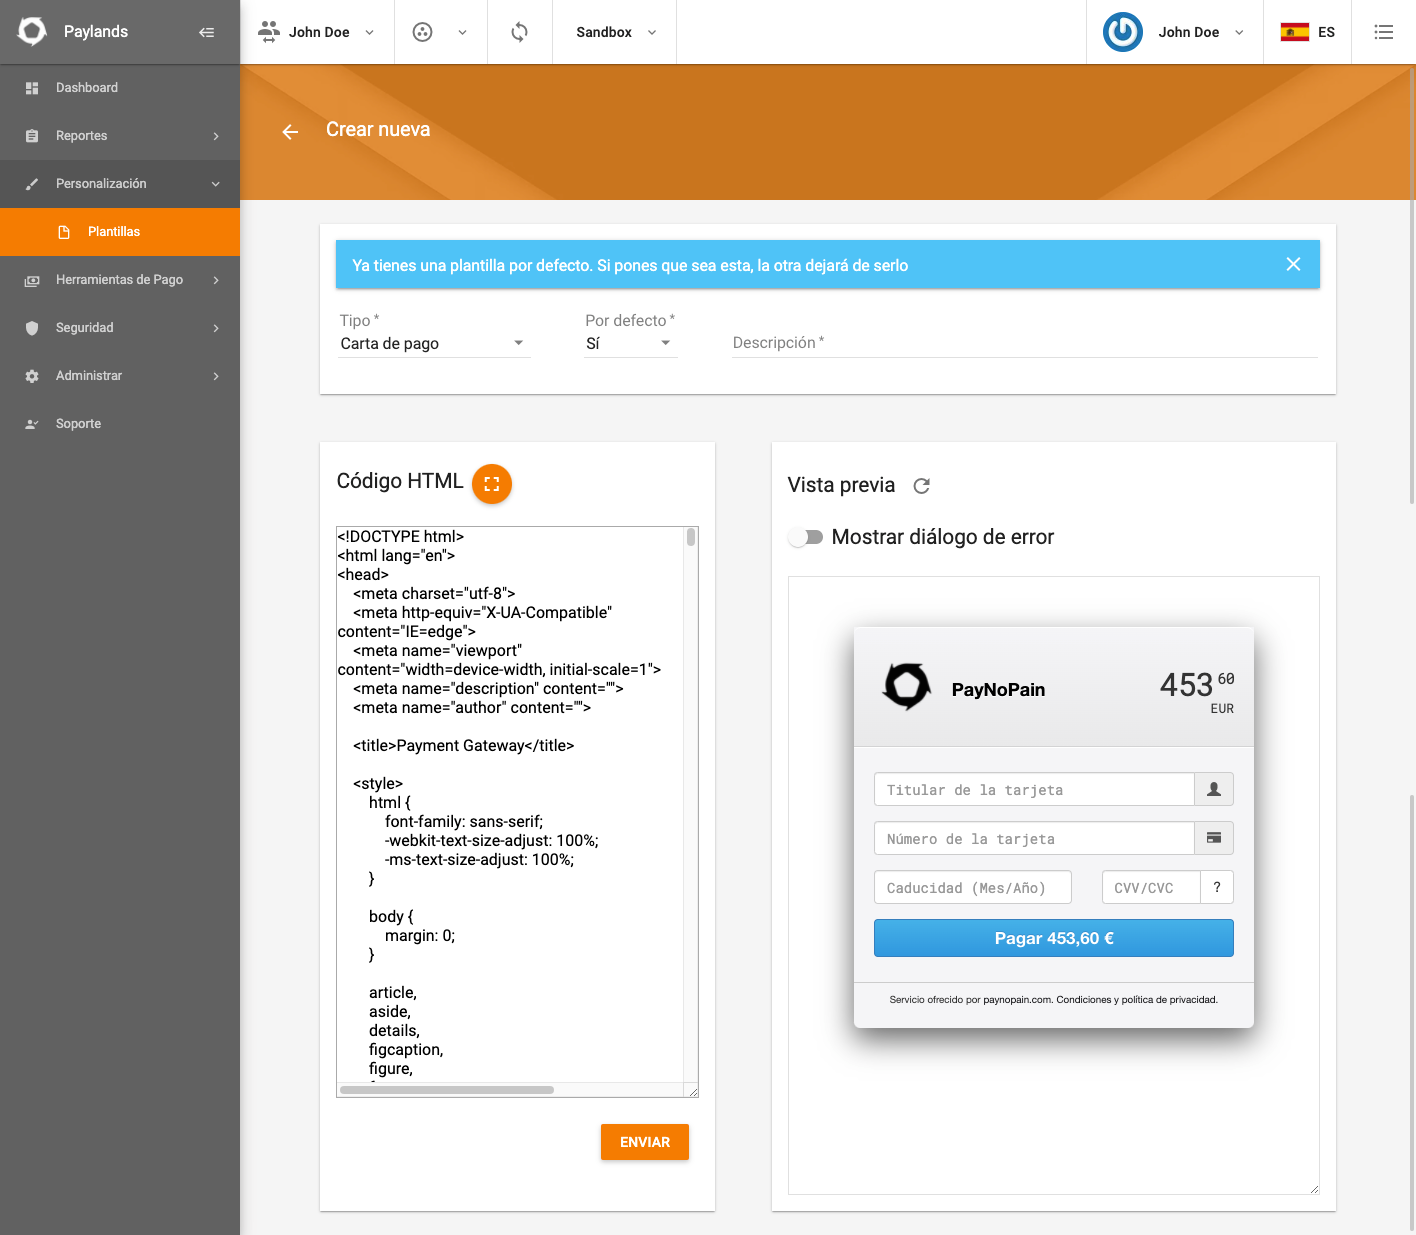
In the form you must choose the template-type, whether this template is considered the default template for the selected type and a description of the template. By selecting Default = Yes, the created template will replace the default template shown by Paylands.
Then an HTML field appears where you can modify the content of the template for the selected template type and on the right hand side the preview of the template is shown. preview of the template is shown on the right. Editing the HTML field will update the changes in the preview box automatically.
To edit in this HTML field several requirements must be followed and a number of predefined-variables can be used as substitute fields to customize the message dynamically.
You can edit the HTML, CSS and Javascript content of the default template. If the Javascript is edited and the change is submitted, the template will remain in pending review status until the Paylands team reviews it. until the Paylands team reviews that the modifications are correct and safe for the end user.
Template Types
In Paylands we have several types of templates that fall into 2 groups:
- With Link. Templates that have a link that redirects you to the payment form.
- With Payment Form. Templates that directly display a payment form.
| Template Type | Template Group | Format |
|---|---|---|
| With link | HTML | |
| SMS | With link | Text |
| Letter of Payment | Form | HTML |
| Tokenization letter | Form | HTML |
| DCC | Form | HTML |
The following explains how to configure the different types of templates:
Email
Email templates can be built according to the merchant's needs. By default the payment URL {{payment_url}} is included and the merchant can customize the message by using the
customize the message using the HTML structure and the various predefined variables available on the platform.

SMS
The SMS template has certain characteristics with respect to the rest of templates that is important to know:
- It does not accept HTML, you can only enter plain text.
- It has only 160 characters to write the message.
- The included payment URL
{{payment_url}}is automatically sent as a shortened URL to save characters.
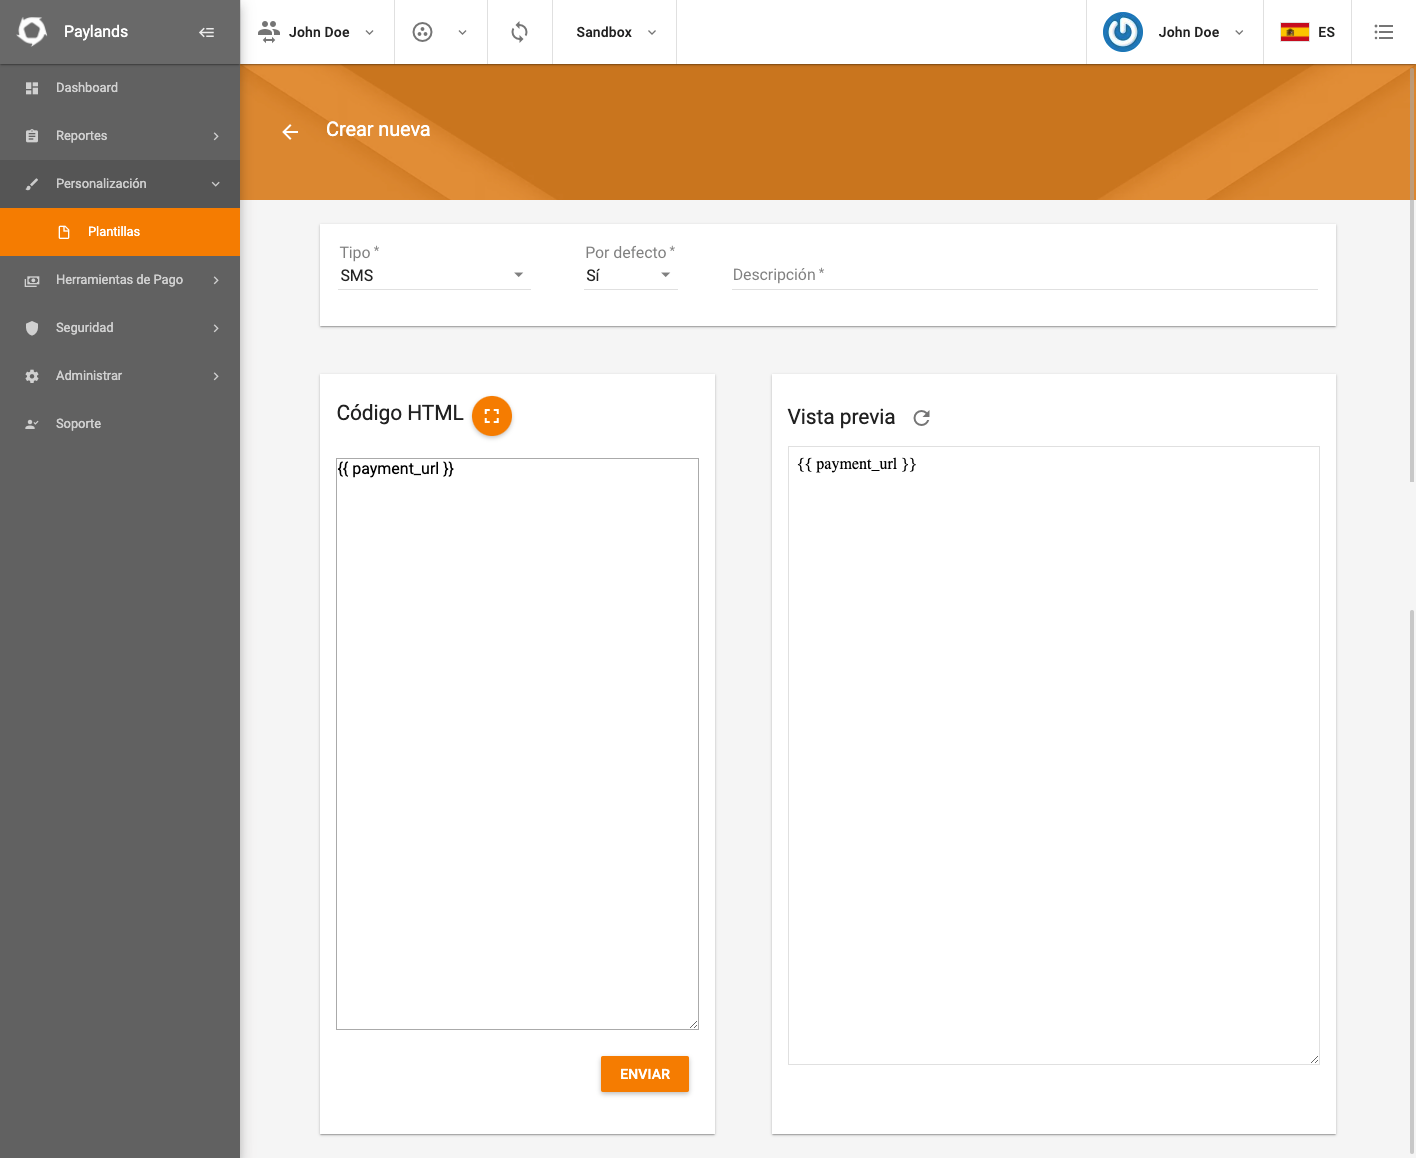
An example of a new SMS template could be: Hi! you can now pay the {{amount}} {{currencySymbol}} by accessing the following link {{payment_url}}.
Payment letter
When using the payment letter integration by redirection, the Paylands payment letter will be shown to the user by default. By configuring a custom template for this payment card, the merchant will be able to modify it according to its brand image.
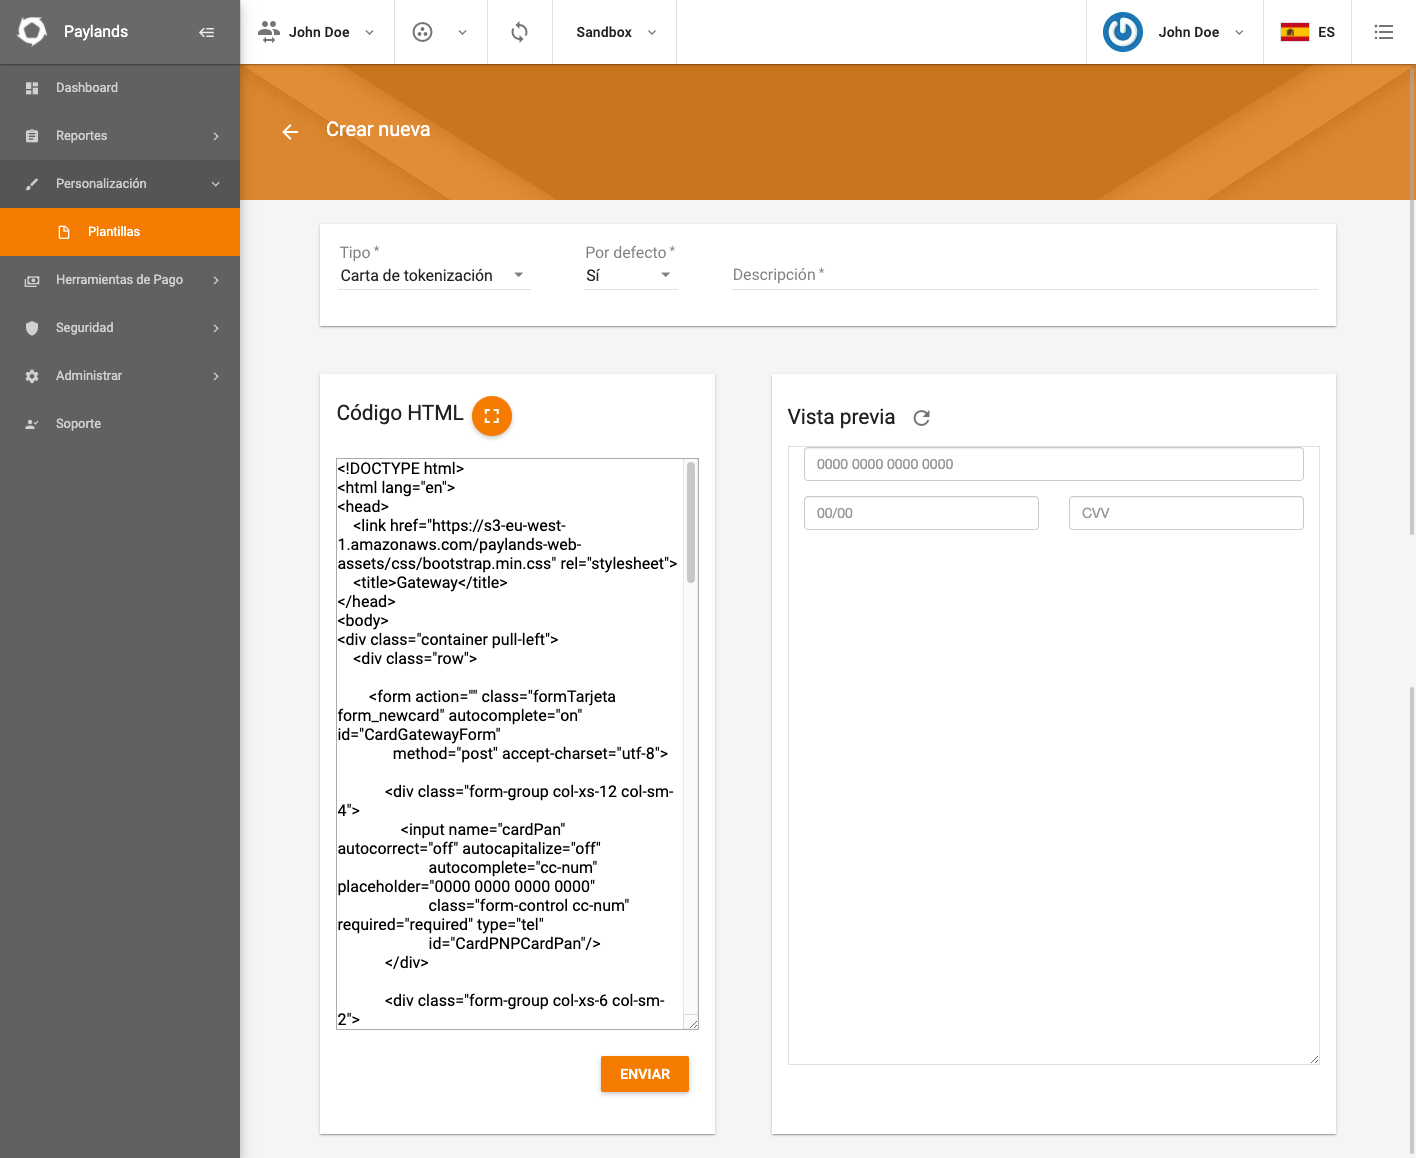
Tokenization Card
The tokenization template shows by default the 3 usual inputs to pay with credit card which are: the card number, the expiration date, and the CVV. They are displayed flat and it is up to the merchant to customize the aesthetics, colors and HTML messages to their liking.
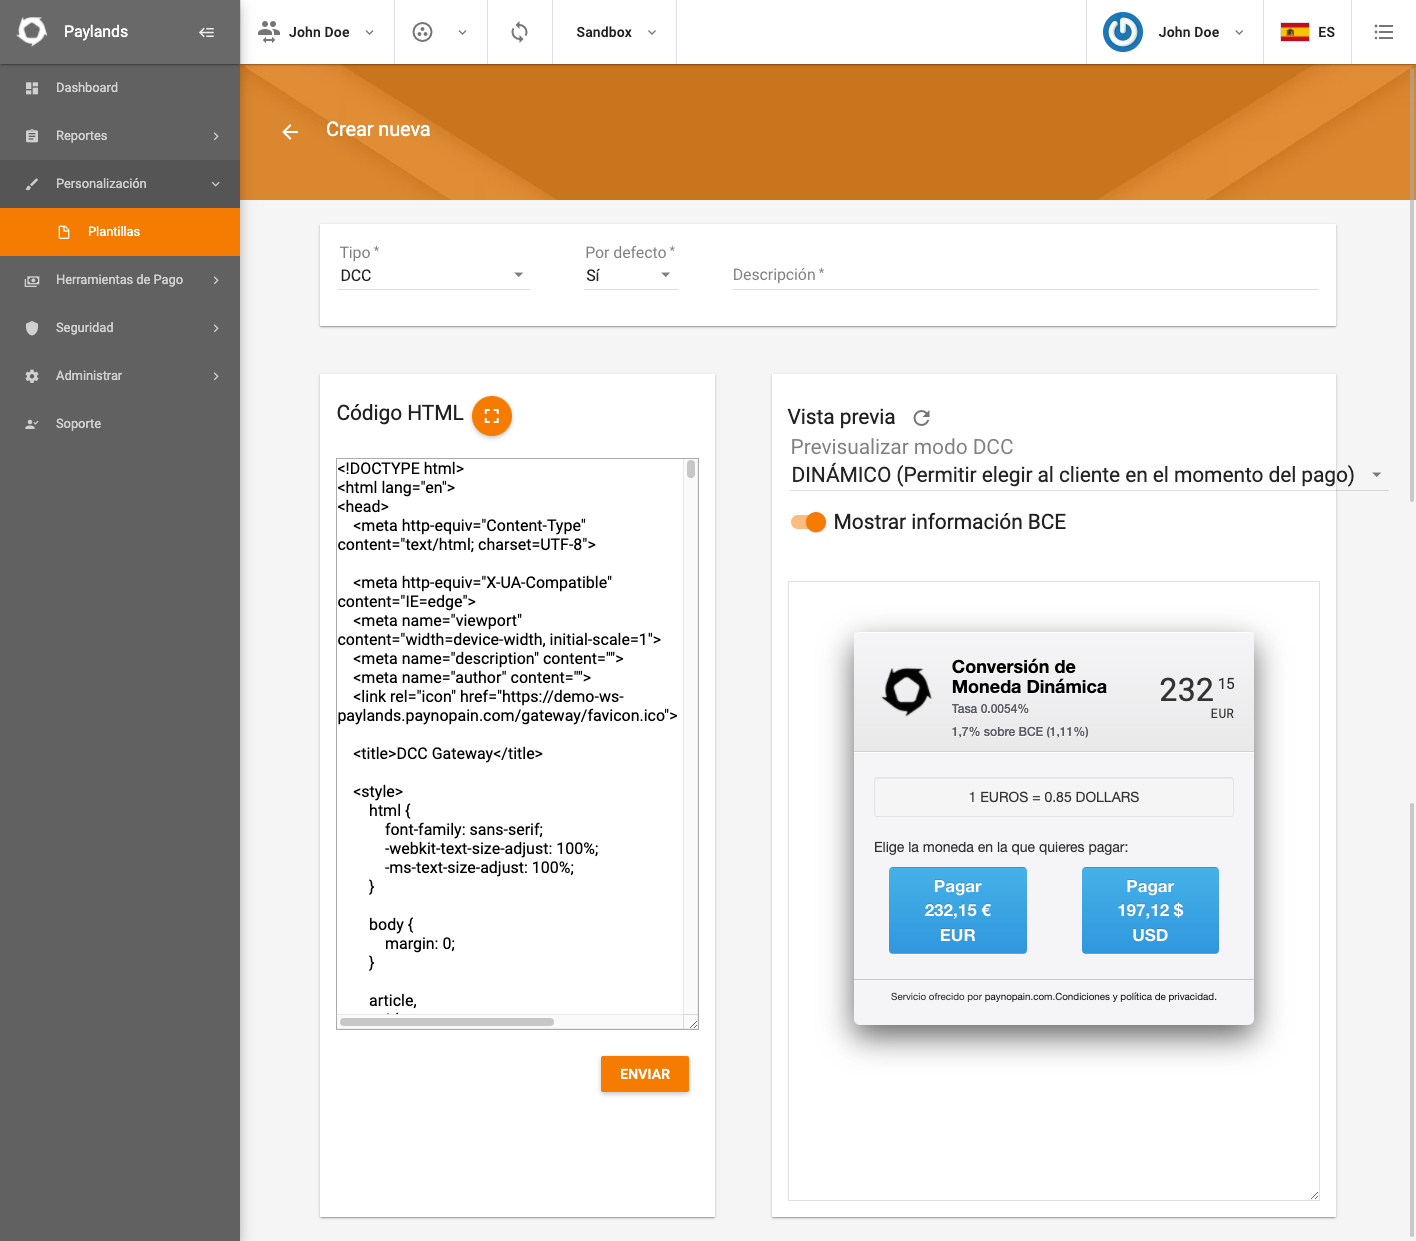
DCC
For the payment card of type DCC we can customize the card on which the user can pay in the currency of his card. We can modify the HTML of the card and preview the card in any of the 3 modes that can be configured:
- LOCAL (In the currency of the customer's Card).
- FOREIGN (In the currency of the Point of Sale)
- DYNAMIC (Allows the customer to choose at the time of payment)
It is also possible to preview how it will look showing or not the ECB information.
Predefined variables
Some variables are passed from the server to the template to be used where necessary, such as the currency or the amount. This allows the merchant to build richer and more dynamic templates for its users. These variables and the type of information they contain are detailed below.
| Variable name | Description | Example |
|---|---|---|
| amount | Amount to be charged, including decimals. | 1254.33 |
| amountInteger | Integer part of the amount to be collected. | 1254 |
| amountDecimal | Decimal part of the amount to be collected. | 33 |
| currencyCode | ISO 4217 code of the currency. | EUR |
| currencySymbol | Currency symbol. | € |
| language | Language on the basis of which the translations will be loaded. | en-US |
| additional | Additional field sent when generating the payment order. | |
| is3DS | Numeric value indicating whether the operation is to be performed via 3DS. | 1 o 0 |
| customer | Identifier of the user at the merchant. This is the value sent in the customer_ext_id field when generating the payment order. | |
| save_card_checkbox | Pre-built HTML that renders the checkbox for a user to indicate if they want to save their card for future payments. | |
| cancel_payment_url | URL to redirect the user to in order to cancel the payment. | |
| cancel_payment_button | Pre-built HTML that redirects the user to the page to cancel the payment. | |
| environment | SANDBOX or PRODUCTION depending on the environment where the payment is being made. |
pre-built HTML of the variable save_card_checkbox.
When using the save_card_checkbox variable the following HTML code will be displayed in your link.
<div class="form-group">
    <div class="input-group">
        <input type="hidden" name="is_saved" value="off"/>
        <input id="CardPNPIsSaved" name="is_saved" type="checkbox" style="outline:none;vertical-align:middle;margin:-2px 0 0" checked/>
        <label id="CardPNPIsSavedLabel" style="user-select:none;" for="CardPNPIsSaved"></label>
    </div>
</div>
pre-built HTML of the cancel_payment_button variable.
Using the cancel_payment_button variable will display the following HTML code in your link.
<div class="form-group" style="margin-top: 10px;">
    <button id="cancelPaymentButton" type="button" class="btn btn-danger btn-md btn-block form-newdata" onclick="window.location.href="https://ws-paylands.paynopain.com/v1/payment/gateway/user-cancel/{token}">
        <span id="cancelPaymentButton">Cancel payment</span>
     </button>
</div>
These variables are returned inside the data object, so the way to access them will be of the form data.amount, data.currencyCode, etc.
The template engine used is Twig, so the {{ }} symbols are used to display the variables.
For example, the following line:
Finish payment of {{ data.amount }} {{ data.currencySymbol}}
Would generate:
Finish payment of €127.34.
Custom fields
Custom fields can be included in the payment letter (with information that is in your own system) by sending a JSON in the additional field of the payment order. The fields in this JSON will be available in the payment letter templates and can be used by accessing the customFields element. Example of use:
additional = {"name": "Juan García", "age": 28}
In the template you can access these variables as in the following example:
Welcome {{data.customFields.name}}, happy {{data.customFields.age}} years.
Requirements
The following are all the factors that must be met by the HTML code in order to function correctly. These requirements are mandatory for the correct functioning of the templates.
- With the exception of SMS, a personalization consists of a single HTML file, which may contain the HTML, CSS and JavaScript code necessary to insert, validate and send the card details, validate and send the card details.
- CSS code must be included within the
<style></style>tags. - JavaScript code should be included within
<script></script>tags. - Resources such as images or libraries (jQuery, for example) should be loaded either via an external url or embedded in the html itself (base64 in html). in the html itself (base64 in the case of images).
- Check the checklist that HTML templates must comply with.
Checklist
Listed below are the requirements that HTML templates must meet.
- CSS and JavaScript are in the same .html file, or loaded from an external url.
- The form has the method="POST" attribute.
- The Pay button is inside the form and is of type SUBMIT. The input of the card holder has the attribute name="cardHolder" The input of the card number has the attribute name="cardPan" The input of the card number has the attribute name="cvv2" The input of the card number has the attribute name=undefined
- Expiration date:
- Sent field is named cardExpireFull.
- The field sent has the format MM/YYYYY or MM/YYYYYY (month and year separated by a slash).
- If you need to show the month and year separately (with two dropdowns, for example), you must set a hidden input with the correct value that complies with the format indicated in the previous point using JavaScript.
- The CVV input has the attribute name=undefined.
Multi-language
Specifically, the payment letter template can be displayed in different languages by passing the lang variable in the queryString of the URL.
The default languages supported and the lang attribute to be sent for each of them are:
| language | lang |
|---|---|
| English | en |
| German | de |
| French | fr |
| Portuguese | pt |
| Catalan | ca |
| Italian | it |
| Hebrew | he |
| Croatian | hr |
| Japanese | jp |
| Dutch | nl |
| Russian | ru |
| Hungarian | hu |
| Polish | pl |
| Chinese | zh-cn |
Therefore, if you want to display the letter of payment in German, the language should be sent with the following URL:
https://api.paylands.com/v1/sandbox/payment/process/TOKEN?lang=de
If no language is specified, the texts will appear in English. In case you need to add a new language other than those supported by default, please contact soporte@paylands.com indicating the language in question and the translations for the following texts:
- Cardholder
- Only letters and spaces are allowed. This field corresponds to the name of the credit card holder.
- Card number
- Expiration (Month/Year)
- Service offered by
- Conditions and privacy policy.
- The CVV (or CVC) is a 3-digit security code printed on the back of the card.
- Invalid Card NumberInvalid Expiration Date
- Invalid security number (CVV).
- The transaction is being processed....